Friday, February 26, 2016

Pick A Stick Challenge - February 2016

Happy Friday Everyone!

How are things in your world?  Things have been hectic here.  We sold our house in three days.... THREE.DAYS!  Holy smokes!  After losing the bid on one new place, we finally found another one.  We'll be moving out to the country somewhere around the first week of April, so I've been scrambling trying to work ahead on projects.  Hopefully, nothing major falls through the cracks.

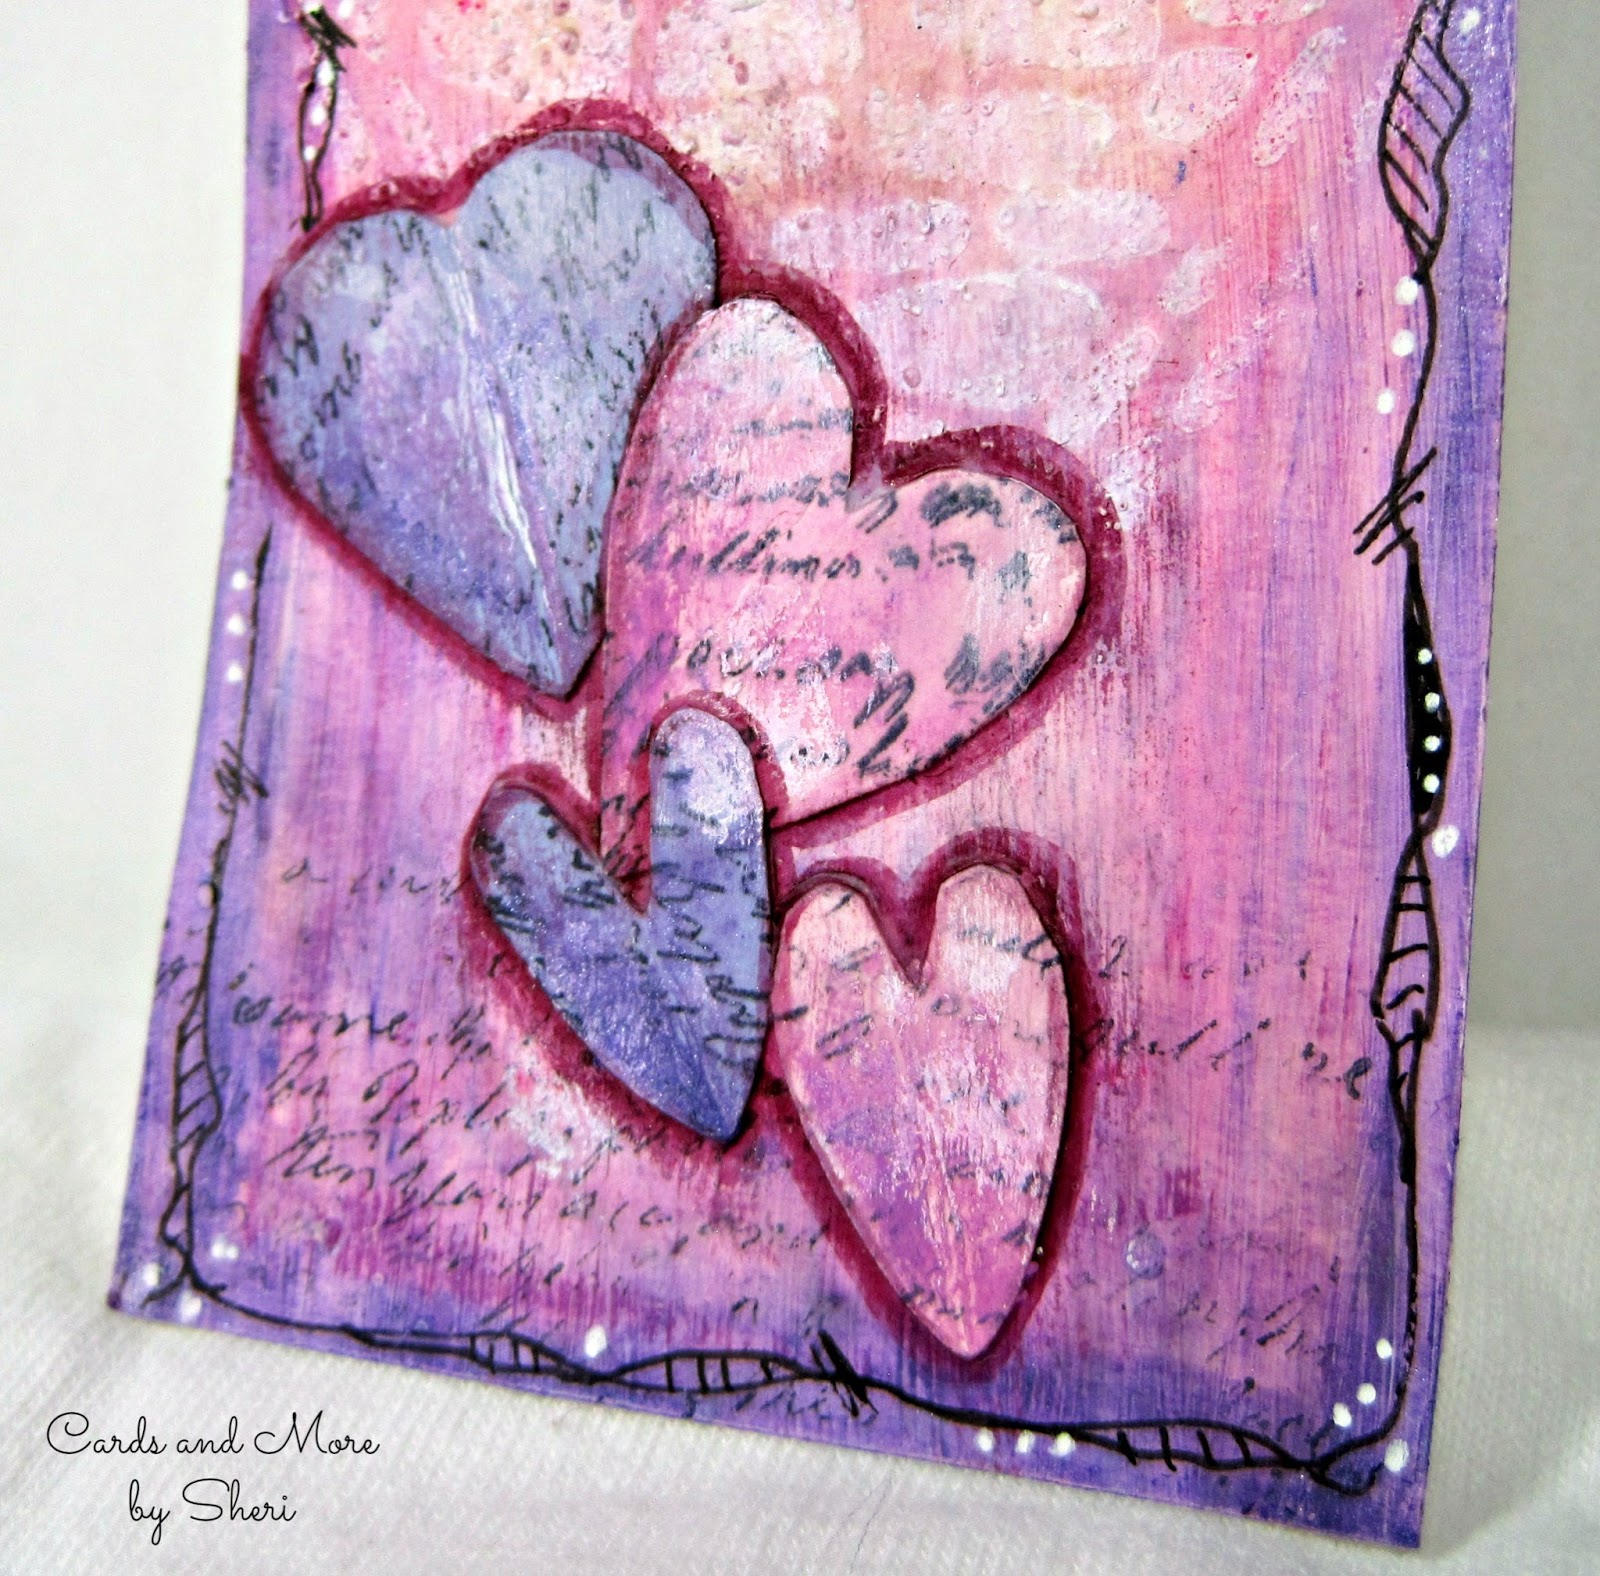
Today, my friends and I, who we like to refer to ourselves as the Fab4 (don't laugh too hard), are publishing our Pick A Stick projects for February.


This is a group we created for monthly art journaling challenges.  Each month, one of us draws from our stash of inspiration sticks to get ten steps to use in order on a project.  That "in order" part always is so difficult for me.

Here are the steps for February:


As always it seems, I did not take still shots along the way during the filming of this project.  You'd think after a while I'd remember to do that, but nooooo!  So be sure to watch the video to see the down and dirty of how I got to this finished project:


This started out as a mop up page in my Canson mixed media journal.  That in itself adds another whole "challenge" to the challenge, trying to make what's already there work!  I also let it dictate my color choices of the other items I used, like the scrapbook paper, napkin, and PITT Big Brush pens.

Here's the video of the whole process:


Be sure to visit Shel, Peg and Lizzie to see their projects as well.


Thanks for looking at my blog. I appreciate all the wonderful comments everyone leaves. Happy Crafting!

Tuesday, February 16, 2016

Tag It Tuesday Feb 2016 Linky Party

Happy Tuesday Everyone!

It's time for our Tag It Tuesday link up party for the month of February!


This month our theme was to use the new Pantone color, rose quartz, as well as incorporating hearts into your project.

I started with a couple of tags that I had already applied some color to them.  Shades of pinks and purples were already on them, so I just rolled with it!!  One tag I sprayed with Color Bloom Spray in silver through a round plastic canvas piece.  I actually didn't end up doing anything further with this tag.  So you never know when it may show up in another project!


The tag I ended up working with began to take shape with a pebbled heart stencil by Dina Wakley.  I stenciled through the small heart with some white acrylic paint using a sponge dauber.  This actually resulted in some nice texture as well.  I also cut out some basic hearts from some scraps of card stock.


I stamped the hearts and tag with a script stamp using Archival Ink in black. Then I used gelatos in the same color family as the tag to add some depth and framing to the tag.

I attached the hearts with matte gel medium, outlined with a PITT Artist Big Brush pen, and added shadows and highlights with my gelatos.


I also used the PITT Big Brush pen to write the word "love" on the tag.  I accented the letters with black outlining and white dots.  Then I added a doodled outline all around the tag for a fun frame.


I really love the way this little tag turned out!


Be sure to watch my video to see the whole fun process!


Now it's your turn to link up the tag you made!  Be sure to visit the other participants and give them some love as well!


Thanks for looking at my blog. I appreciate all the wonderful comments everyone leaves. Happy Crafting!

Sunday, February 14, 2016

Valentine Mini Junk Journal / Fab4Creates

Happy Sunday Everyone!
Happy Valentine's Day!

Smiley from Millan.Net

I hope you all are having a lovely day!  Today I'm sharing with you a little project my Fab4Creates pals and I are doing in honor of Valentine's Day.  We decided it would be fun to send each other a little envelope of appropriately themed goodies that we had to use in a project of our choice and see what we each came up with.

I got my goodies from Lizzie of Lizzie's Workshop.  You can visit her blog here and her YouTube channel here.  My envelope had some sweet mulberry paper hearts, cupid/angel and flower die cuts, some Valentine's ticket stubs, some fun and funky red flowers and leaves that I still can't figure out what they're made from, and a great monoprint with a circles pattern.  Here's some of what I had left over:


Rather than make a card or journal page, I decided to make a mini junk journal.  I already had a cover prepared from a small box that I had covered with some lightweight kraft packing paper, followed by a coat of gesso.

As always, I forget to take process pics while I'm creating.  I just get to rolling and forget to pause for pics!  So, as always, you'll have to watch the video for the blow-by-blow action.


I attached a little doily to the spine and the painted the whole cover with Folk Art Metallic paint in Rose Shimmer.  Then I added a little extra interest by spraying and dabbing paint through a stencil.  To complete the cover, I attached some of the die cuts, a ticket and a mulberry heart.


The interior consists of six little signatures.  Each signature has an assortment of tea dyed papers and index cards, leftover bits of scrapbook paper, mini glassine bags and tea dyed tags.


I even added a few bead dangles to the twine binding.


Be sure to check out the projects made by Shel and Peg as well!


Thanks for looking at my blog. I appreciate all the wonderful comments everyone leaves. Happy Crafting!

Tuesday, February 2, 2016

Tag It Tuesday Theme for Feb 2016

Happy Tuesday Everyone!

It's time to announce our Tag It Tuesday theme for February.


As we've discussed, this year we're going to be focusing more on color, and I'm primarily working with the Spring 2016 Pantone Colors.


I confess I was a bit predictable when I chose our theme for February.  This month's theme is to use the color Rose Quartz and some hearts.  I know, I know....Valentine's Day and all that jazz.  You can be as liberal or as sparing as you want with both the color and the hearts.
Smiley from Millan.Net


This little graphic shows you the RGB value of the color.  This is great if you want to actually plug those into a computer program and print an actual swatch of the color to see in person.  You can do this in Word, Power Point, Publisher, Adobe....any program where you can add a shape and pick the color to fill in that shape.  Rather than picking one of the program's pre-fab colors, just choose to pick a custom colors and there should be a spot where you can plug in the actual RGB color numbers.  If you need more help doing this, just let me know and I'll be glad to put together a tutorial for you.

The link up party will be posted on February 16, so you have lots of time to play and create.    So have fun with your tags and I'll see you back here in a few weeks!


Thanks for looking at my blog. I appreciate all the wonderful comments everyone leaves. Happy Crafting!